Pre-Migration NetSuite Checklist
Before you push your first batch of data into NetSuite, run through this checklist inside your NetSuite account. Catching these things early saves you from mid-migration push errors and reconciliation mismatches that are a pain to debug after the fact.
1. Web Services & Integration Record configured
SuiteMigration connects to NetSuite over SOAP/REST web services using Token-Based Authentication. Make sure the required features are enabled and you have a NetSuite Integration Record with a Consumer Key/Secret and Token ID/Secret ready.
See Connect to NetSuite for the full setup walkthrough.
2. Journal Entry Approval Routing disabled
This is the most common cause of confusing reconciliation mismatches during migration, so check it first.
NetSuite's Approval Routing feature can require Journal Entries to be approved before they post. Until that happens, the JE doesn't hit the General Ledger, so it doesn't count toward account balances or the Trial Balance yet. That's a problem for anything comparing source vs. destination totals off the GL: Trial Balance Reconciliation, and the Trial Balance, Profit & Loss, and Balance Sheet comparison reports (Cash Flow too, if the entry touches a cash account). A/R Aging and A/P Aging are unaffected, since they're built from invoice/bill subledger data rather than GL postings, and Push Results only tracks whether a record pushed, not whether it's posted yet.
You'll most likely notice this first on Date Range Push. It verifies every interval by comparing source vs. destination Trial Balance totals, and does that in all three reconciliation modes, including the default No Reconciliation JE mode, which still checks totals, it just skips posting a reconciliation JE. Auto-Reconcile goes a step further and posts a net-to-zero JE and a rebuild JE before re-verifying. Either way, if Approval Routing is on, the JEs SuiteMigration posts (or ones already sitting pending approval in that date range) don't hit the GL right away, so the totals don't line up and the interval comes back as a mismatch.
That mismatch doesn't behave the same in every mode. In the default mode it just gets logged as a "Source vs destination mismatch" and the push moves on to the next interval. In Auto-Reconcile, a mismatch can actually pause the run, since it needs solid starting numbers before posting the rebuild JE. So don't rule out approval routing just because the mismatches you're seeing are only in the default mode.
SuiteMigration flags this with a note on the Date Range Push screen too, though it's easy to scroll past. Worth confirming in NetSuite ahead of time instead.
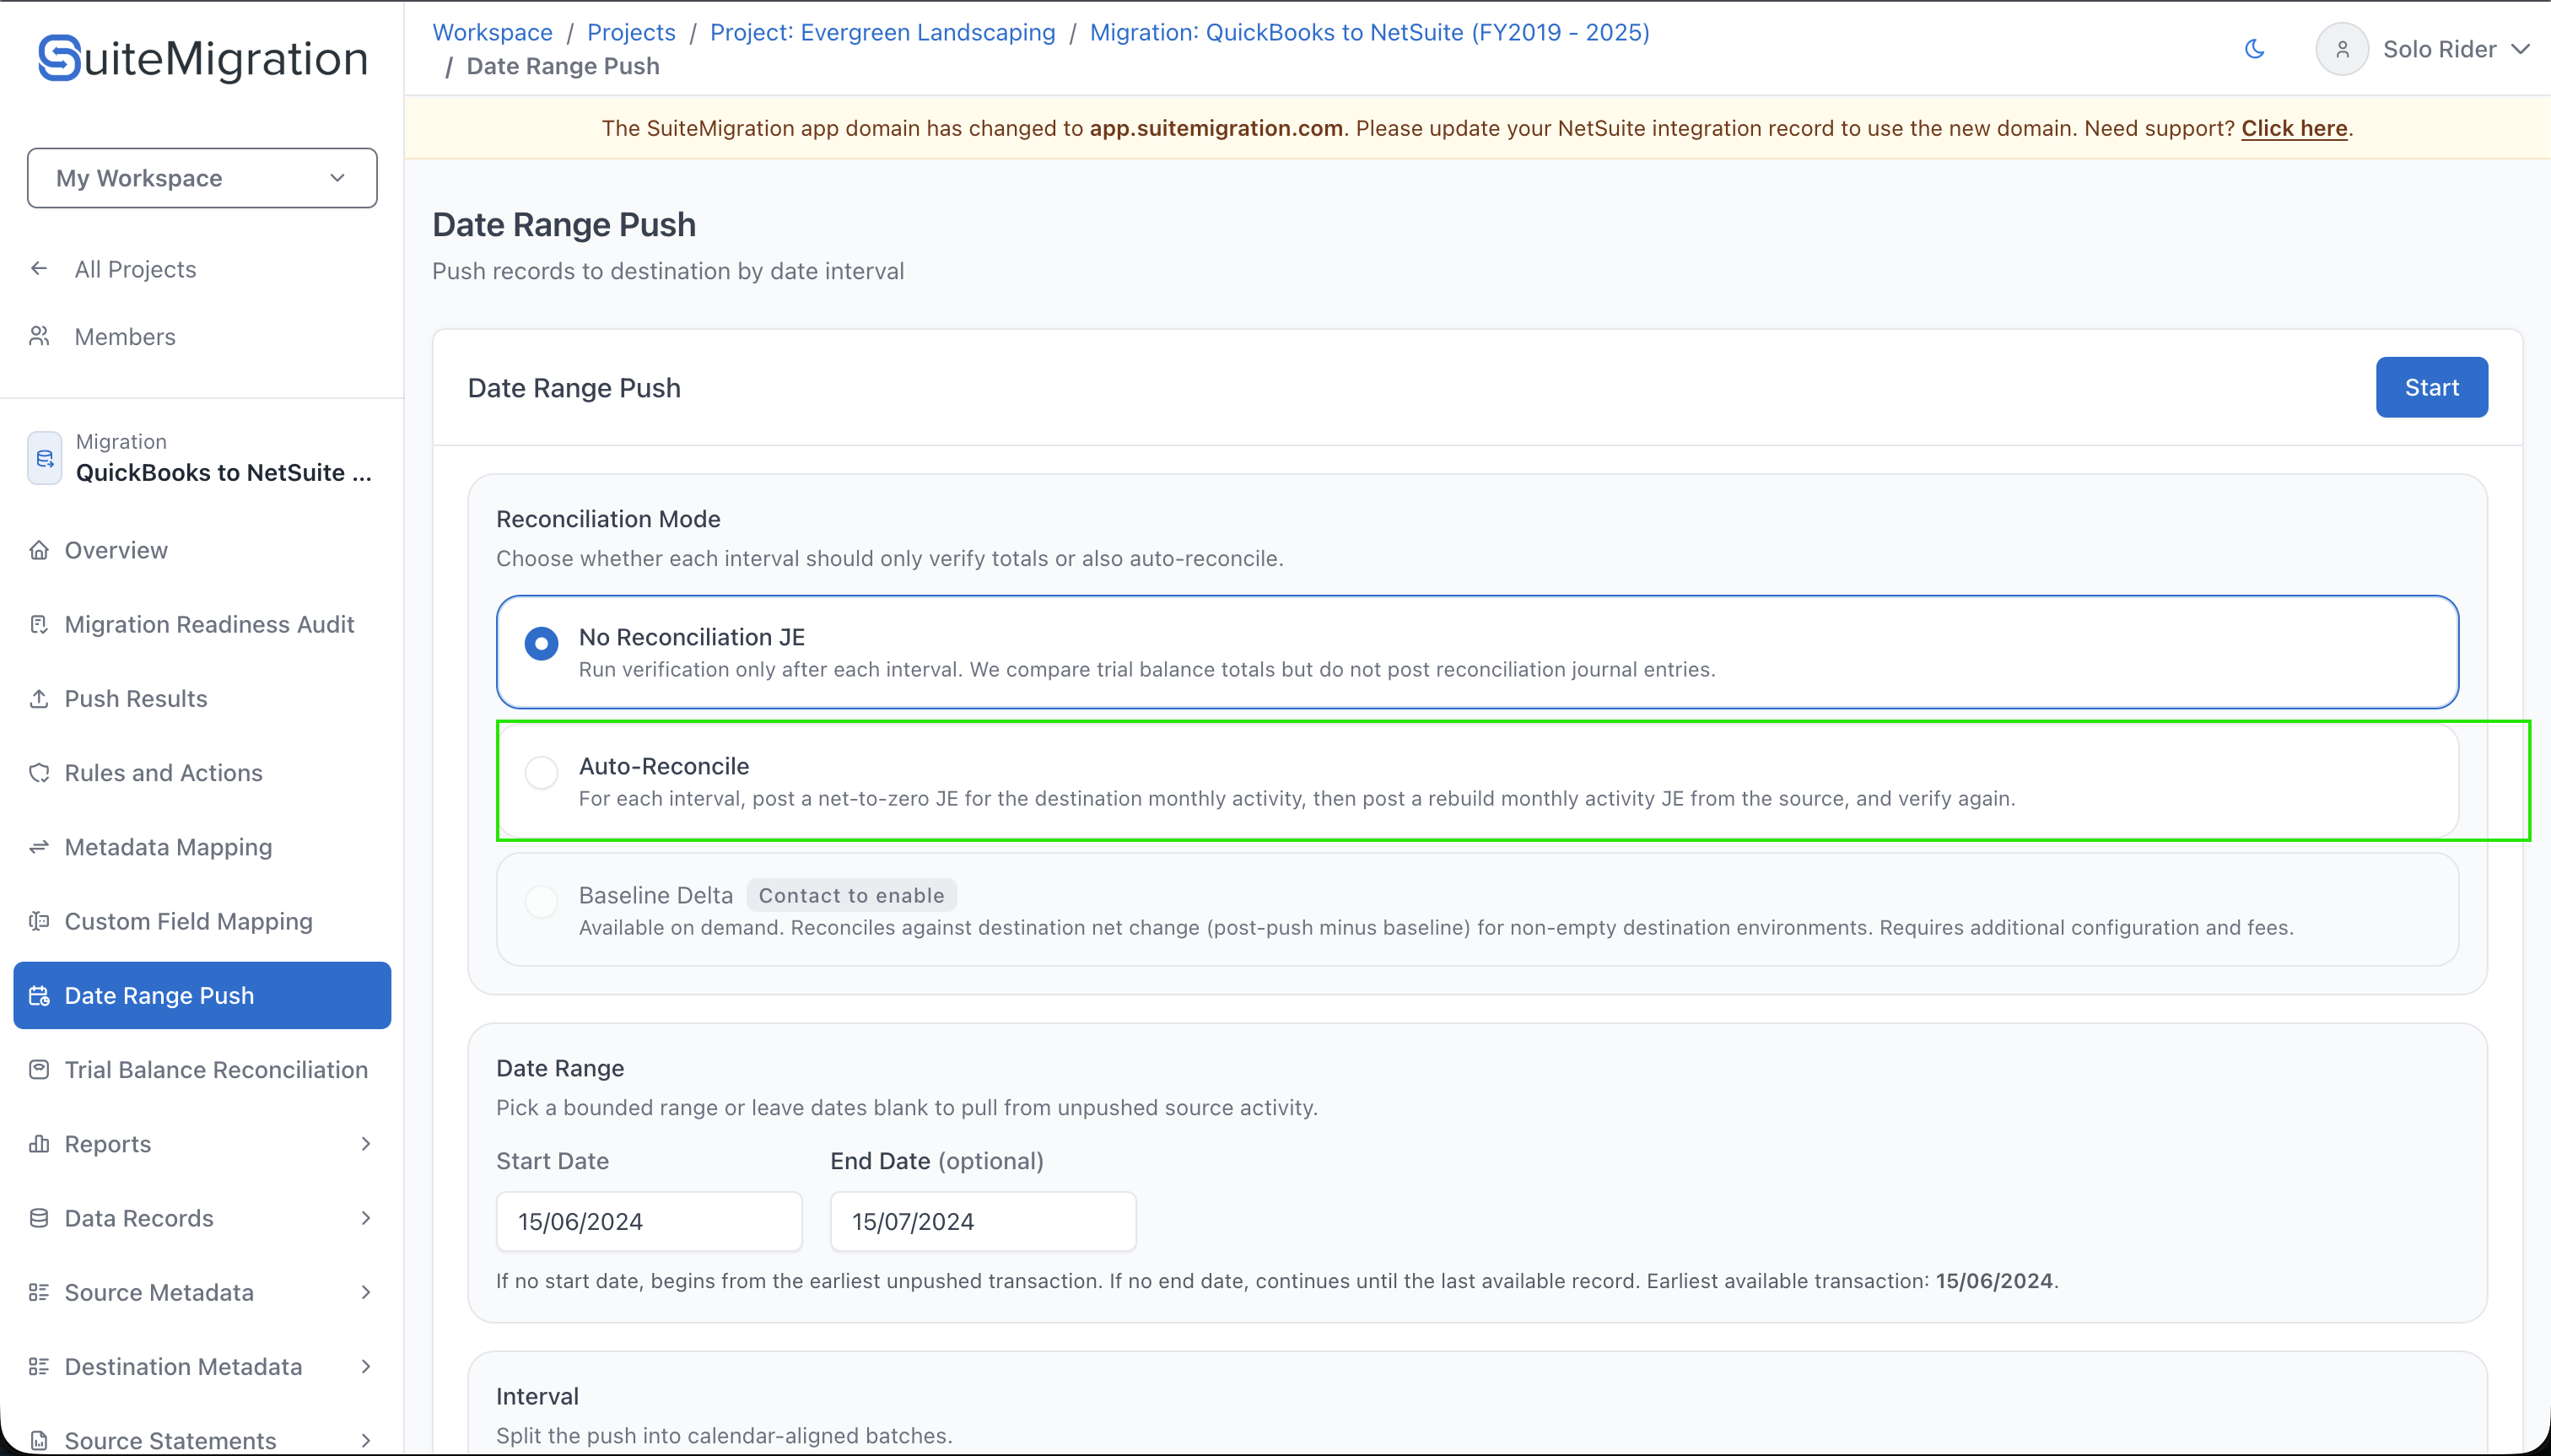
And this isn't limited to records you'd literally call a Journal Entry. Checks, deposits, credit-card charges, credit-card refunds, and cash expenses normally push as their native NetSuite record types, not as JEs. But if a specific record can't push natively (a check with no payee, say), or you've opted it into the JE fallback yourself, it goes through as a JE instead, and approval routing catches those records too.
Checking and disabling it:
-
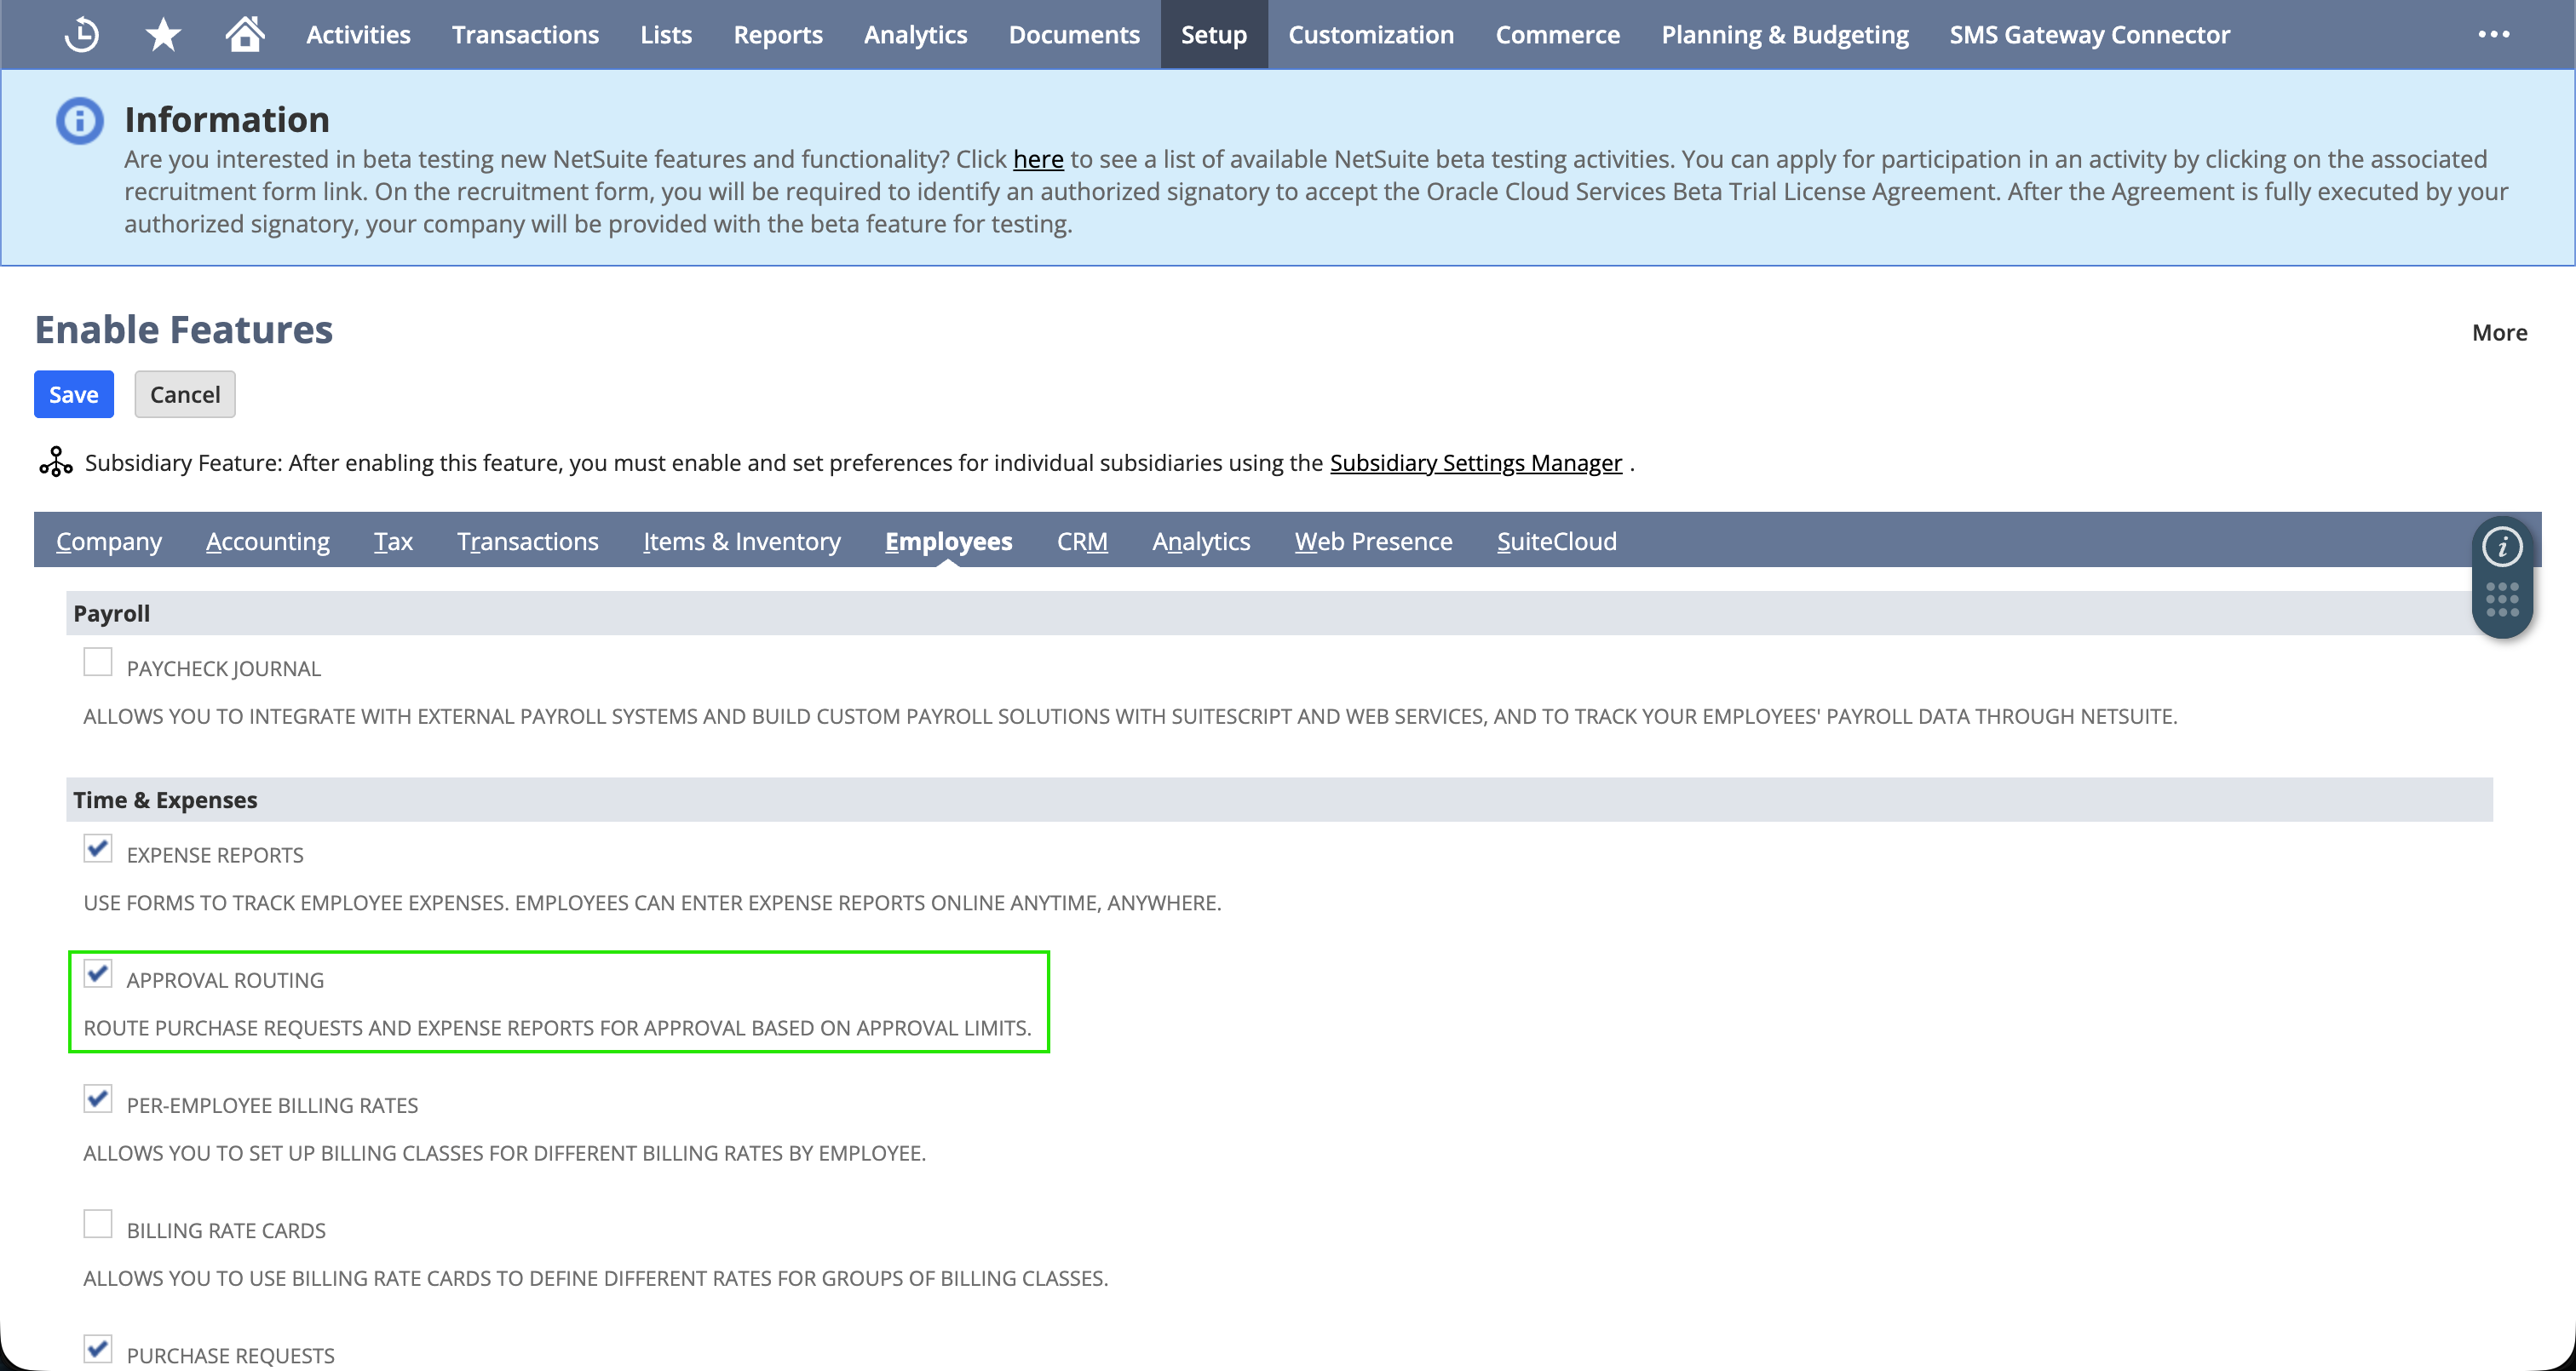
In NetSuite, go to Setup → Company → Enable Features, open the Employees subtab, and see whether Approval Routing is checked. This is the master switch, not a per-record setting. If it's already off, you're done here. No need to turn it on just to follow along.
-
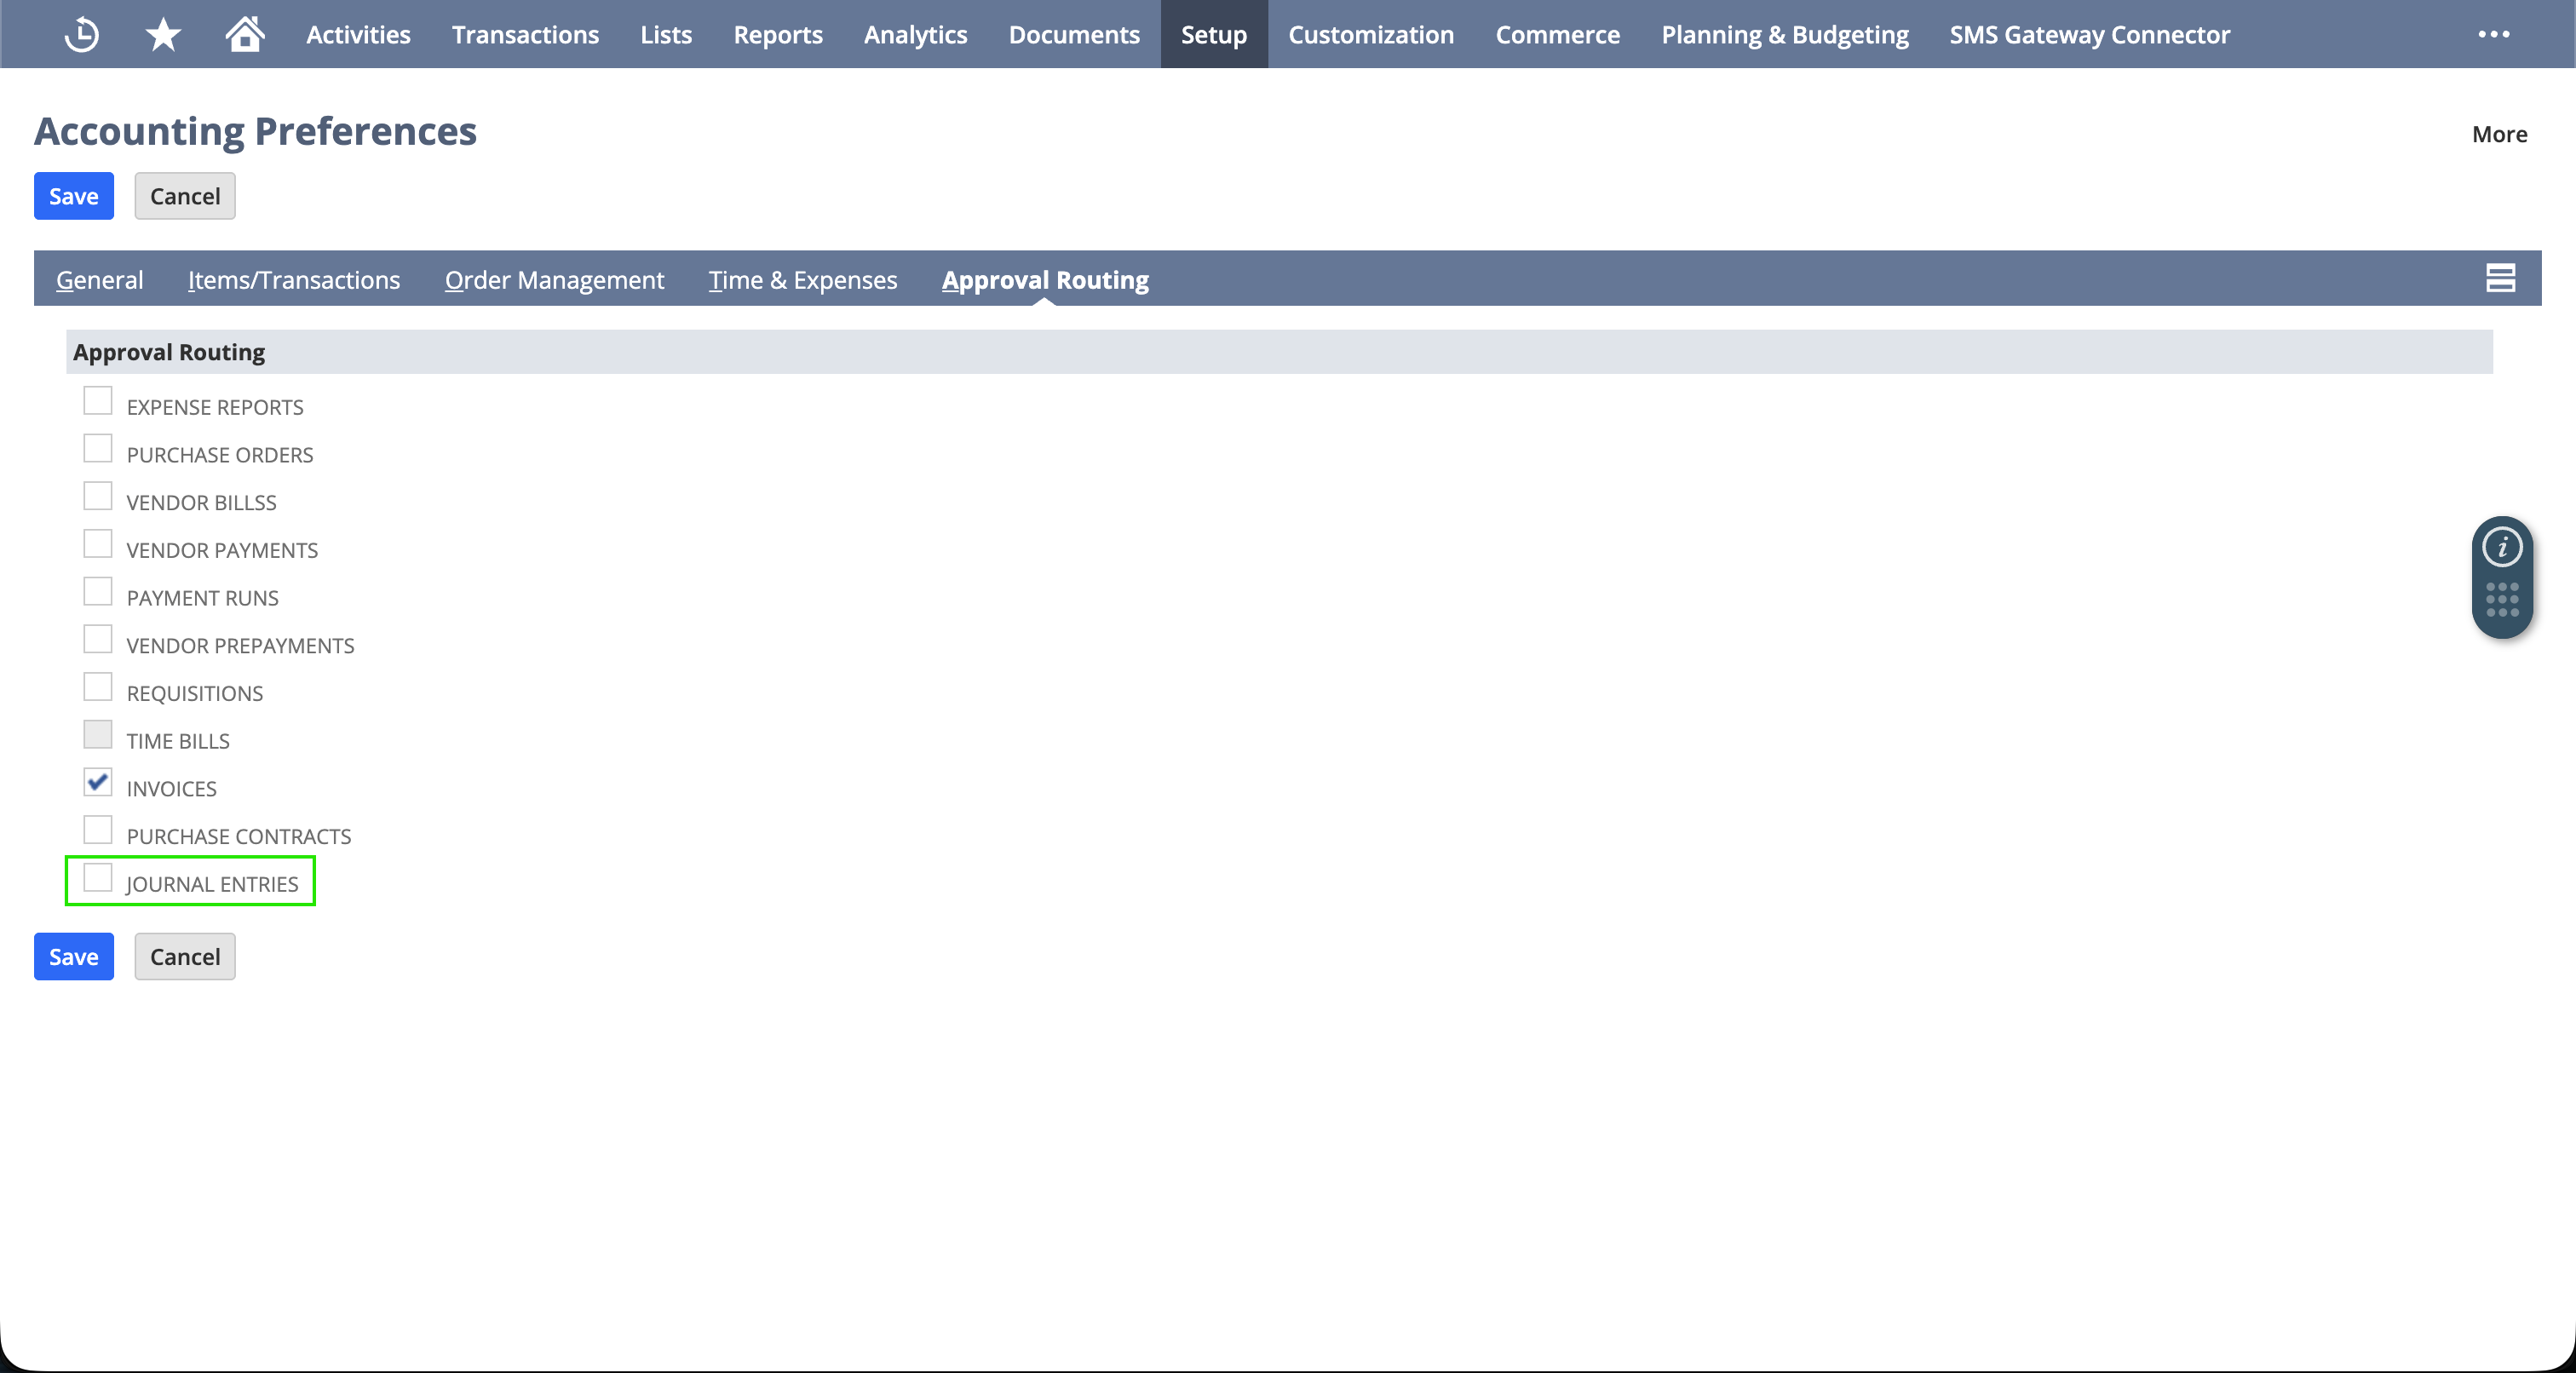
If it is checked, go to Setup → Accounting → Accounting Preferences → Approval Routing subtab and look for Journal Entries in the list.
-
Uncheck it and save.
- There's a second, separate switch that catches people out: Setup → Accounting → Accounting Preferences → General subtab has a Require Approvals on Journal Entries preference in the General Ledger section. It's cleared by someone with Journal Approval permission, and leaving it on will hold JEs pending even after you've turned off Approval Routing above. Uncheck that one too.
If approval routing is part of your normal internal controls, turn both back on once migration wraps up and you've reconciled the final numbers.
3. Payment Instruments feature matches your Migration Settings
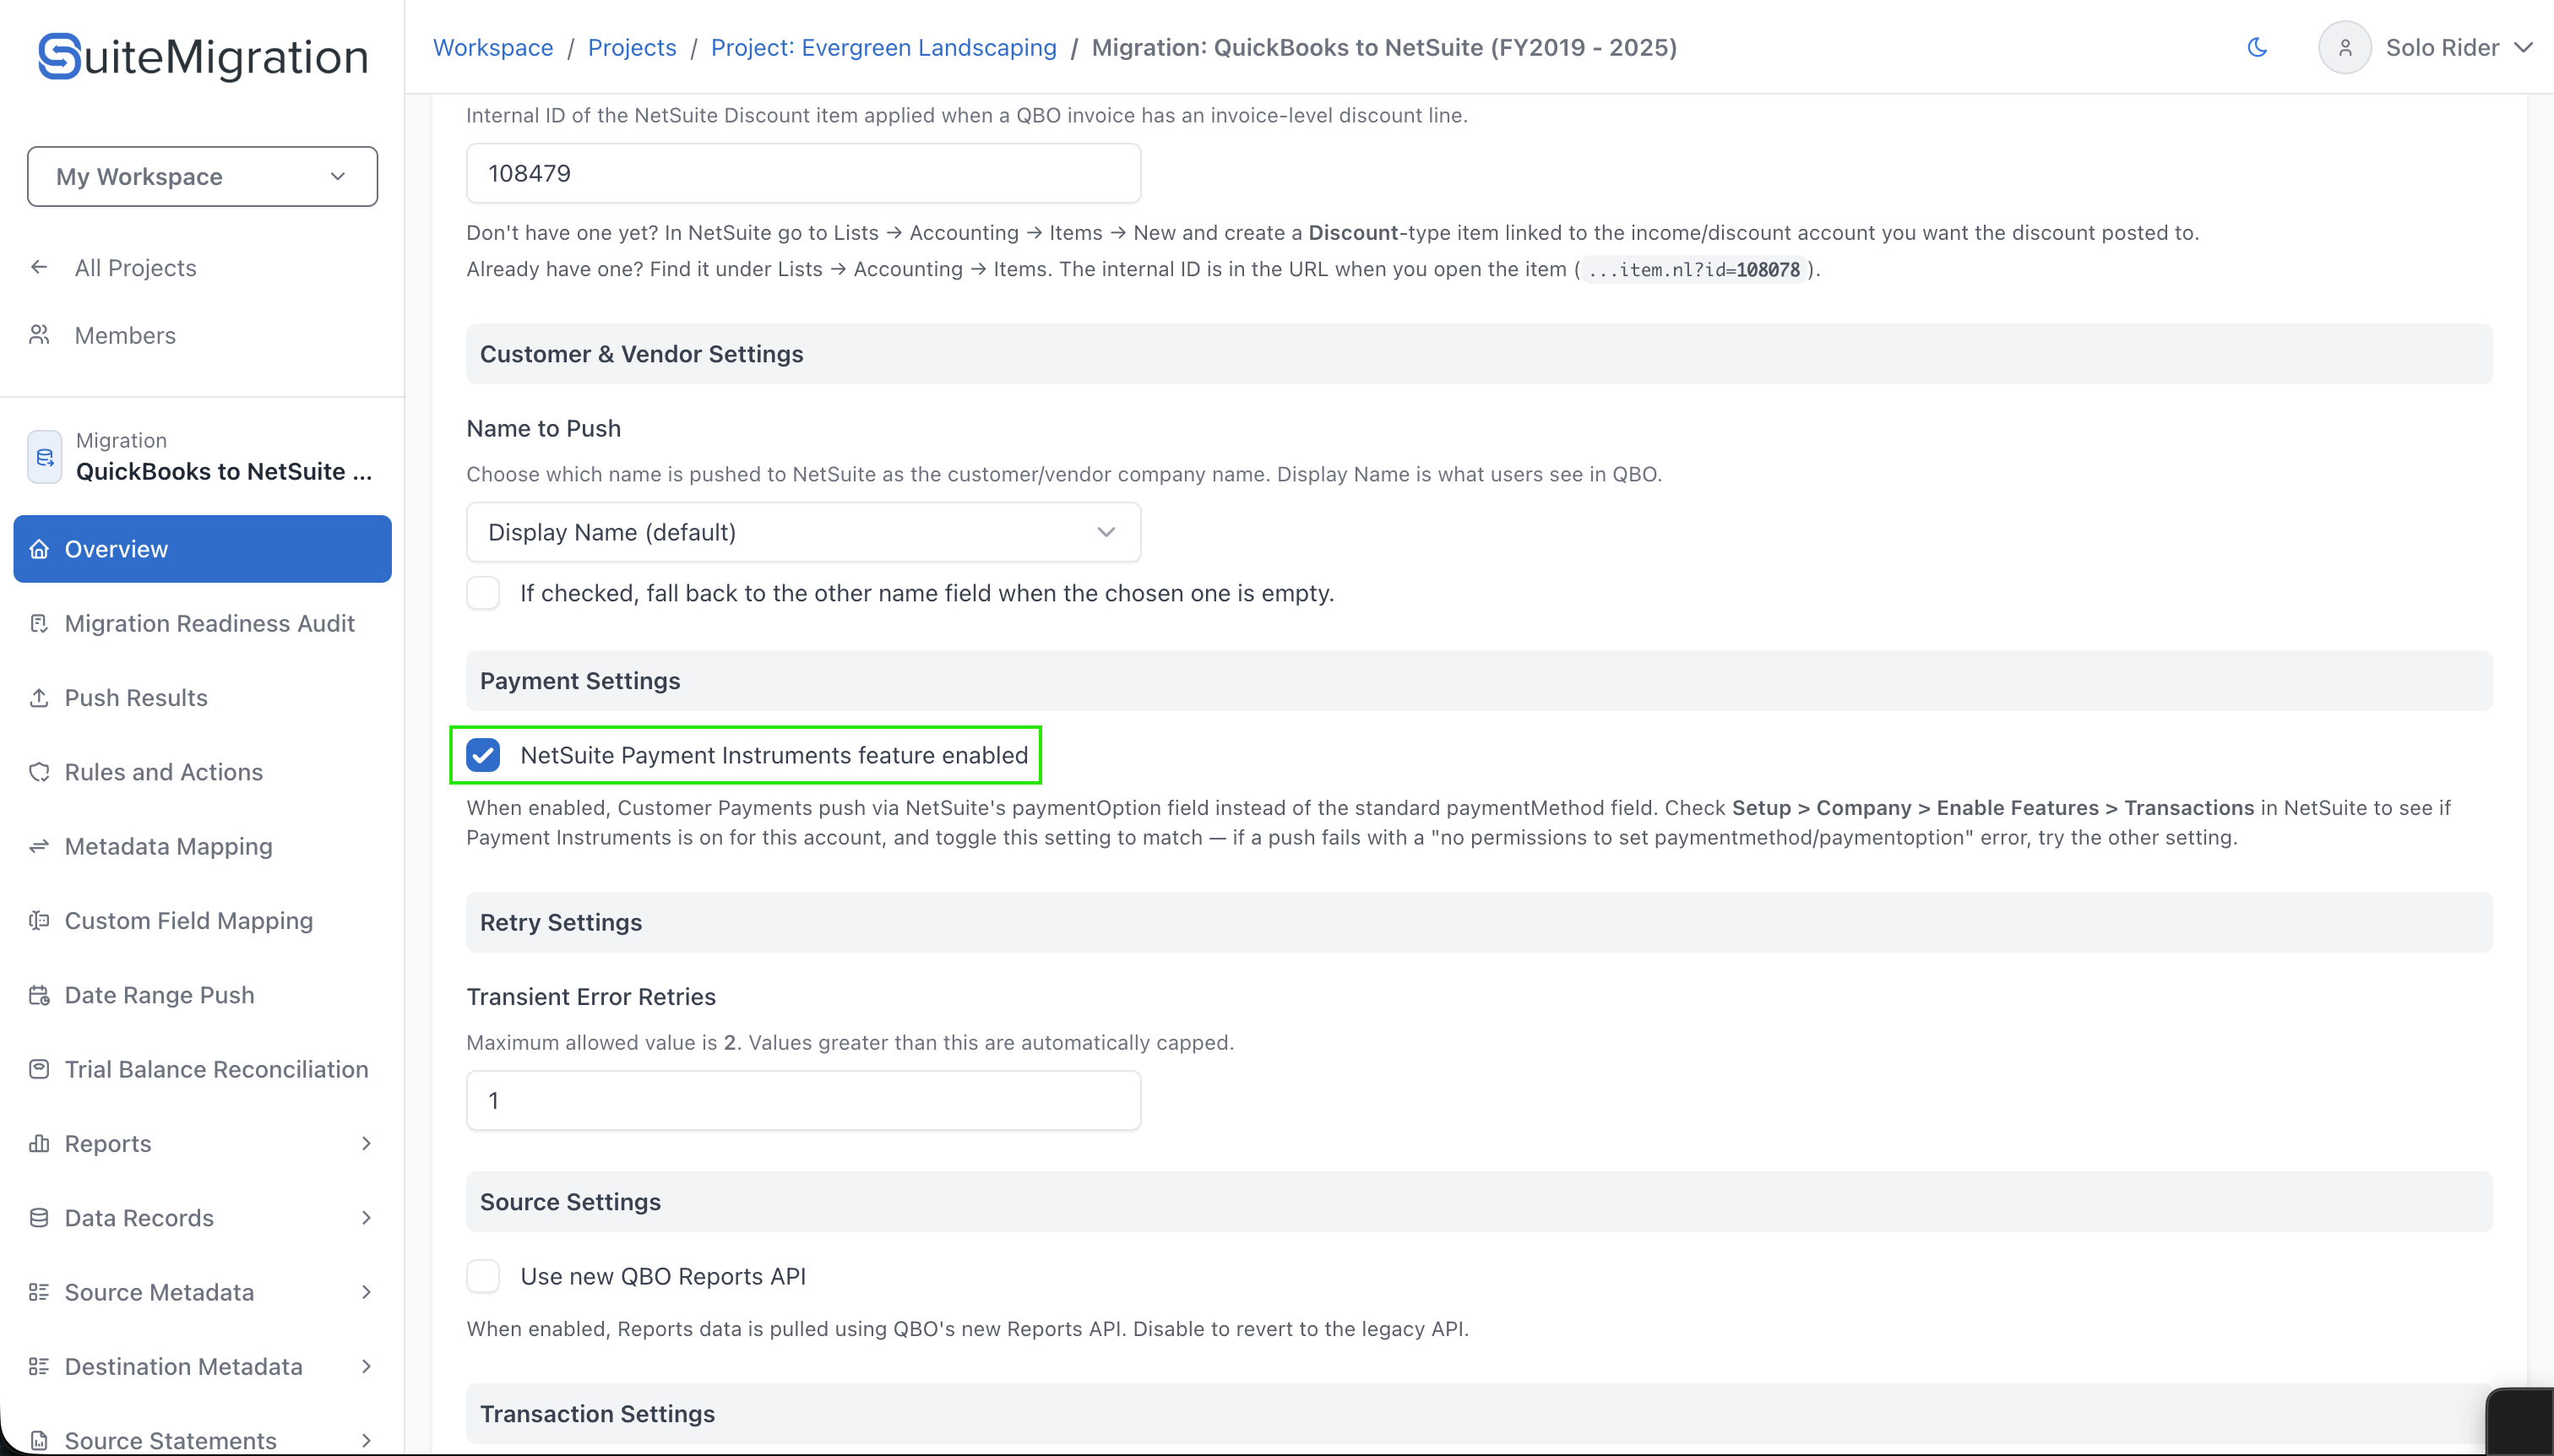
NetSuite's Payment Instruments feature (Setup → Company → Enable Features → Transactions) changes how Customer Payment records store payment method and card/bank details. SuiteMigration has a matching toggle for this in Migration Settings, and it needs to match whatever's actually set in your destination account.
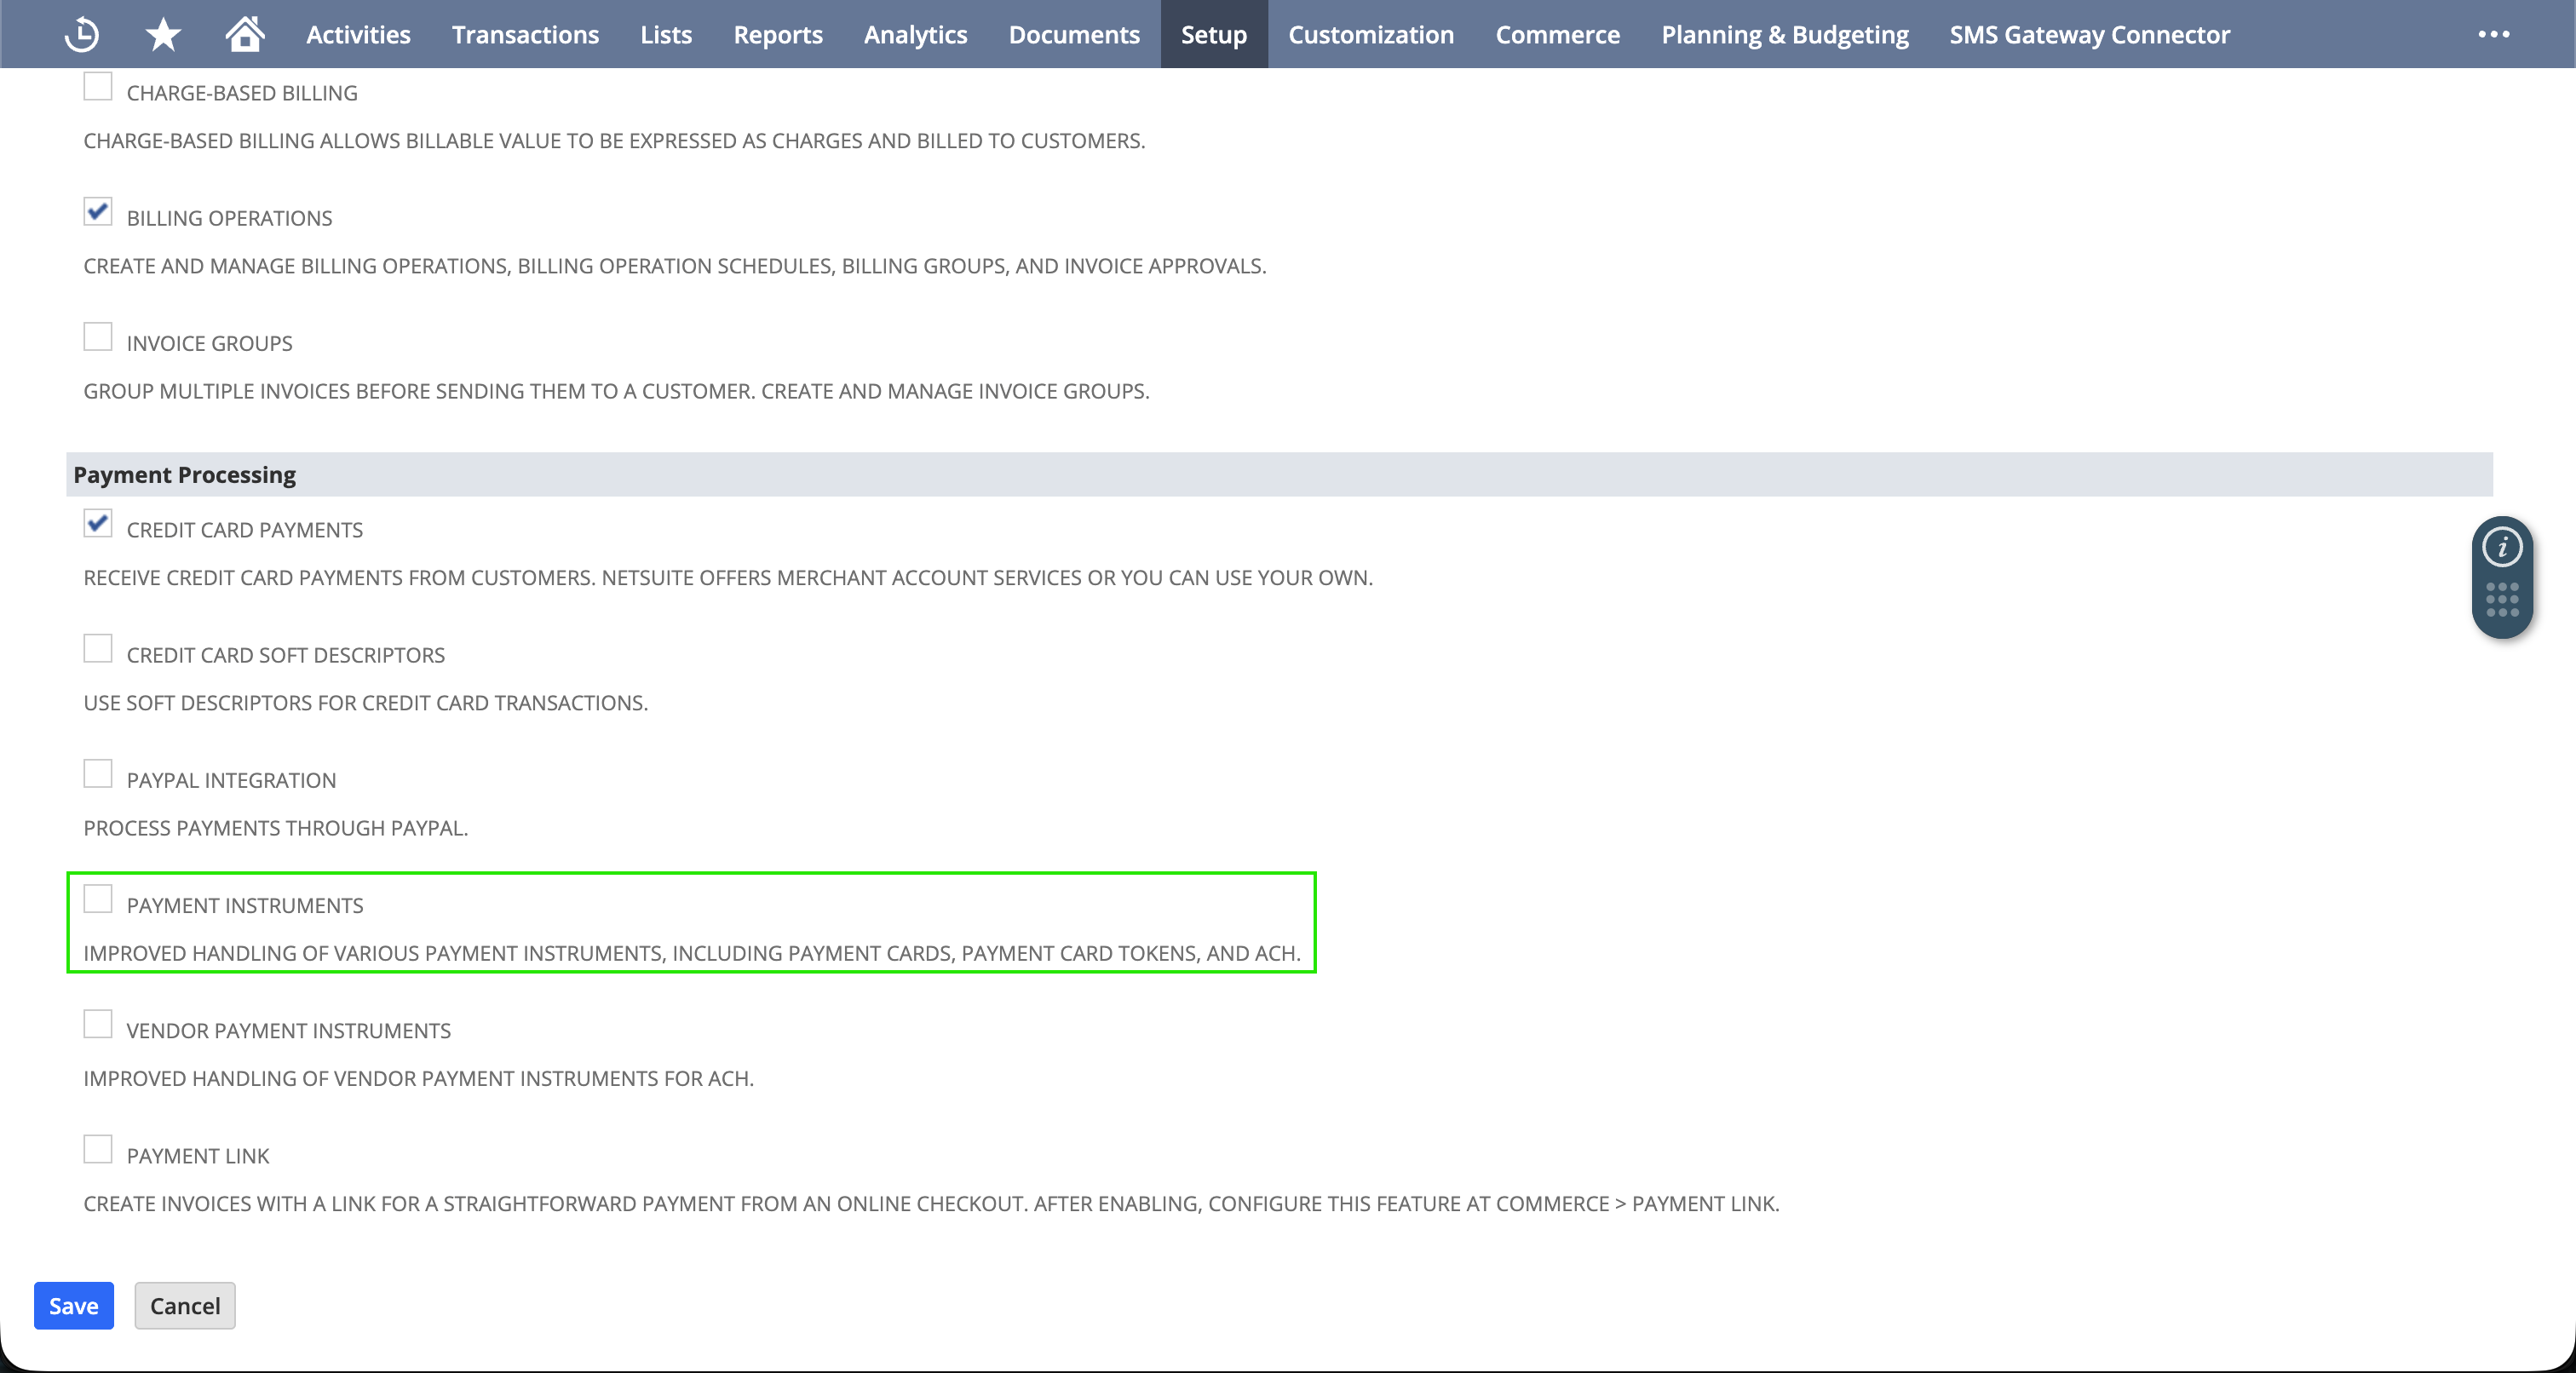
If the two are out of sync, Customer Payment pushes fail with a permissions error on the payment method/option fields. Check the NetSuite setting first, then flip the Payment Settings toggle in SuiteMigration's Migration Settings to match before you push.
4. Default A/R Account identified
Know which NetSuite account is your default Accounts Receivable account before you start migrating. SuiteMigration needs it to resolve customer payments that don't carry an explicit account reference. You'll actually set this under Project Settings → Validation once your NetSuite destination is connected and synced, but it's worth figuring out now while you're already in NetSuite.
The A/P side doesn't need this: it resolves on its own when your books have exactly one A/P account, and only needs your attention if there's ambiguity across multiple. Undeposited Funds doesn't need a setting either. When a payment's deposit account is Undeposited Funds, SuiteMigration just omits the account reference and lets NetSuite apply its own default.
See Mixed A/R Account Rule for how to find your default A/R account in NetSuite, and Project Settings for where to enter it.
5. Subsidiary selected
When you connect your NetSuite destination, you pick the subsidiary data gets pushed into (Step 3 of Connect to NetSuite). Double-check it's the one you actually intend to migrate into before you start pushing. Not something you want to discover is wrong after records have already landed.
6. SuiteTax enabled (if migrating tax data)
If you're migrating from QuickBooks Online and need tax amounts to push through to NetSuite, SuiteTax needs to be set up on the destination account first.
See Set Up SuiteTax in NetSuite for the full setup steps.
7. "Bill in Advance of Receipt" enabled (if migrating Purchase Orders)
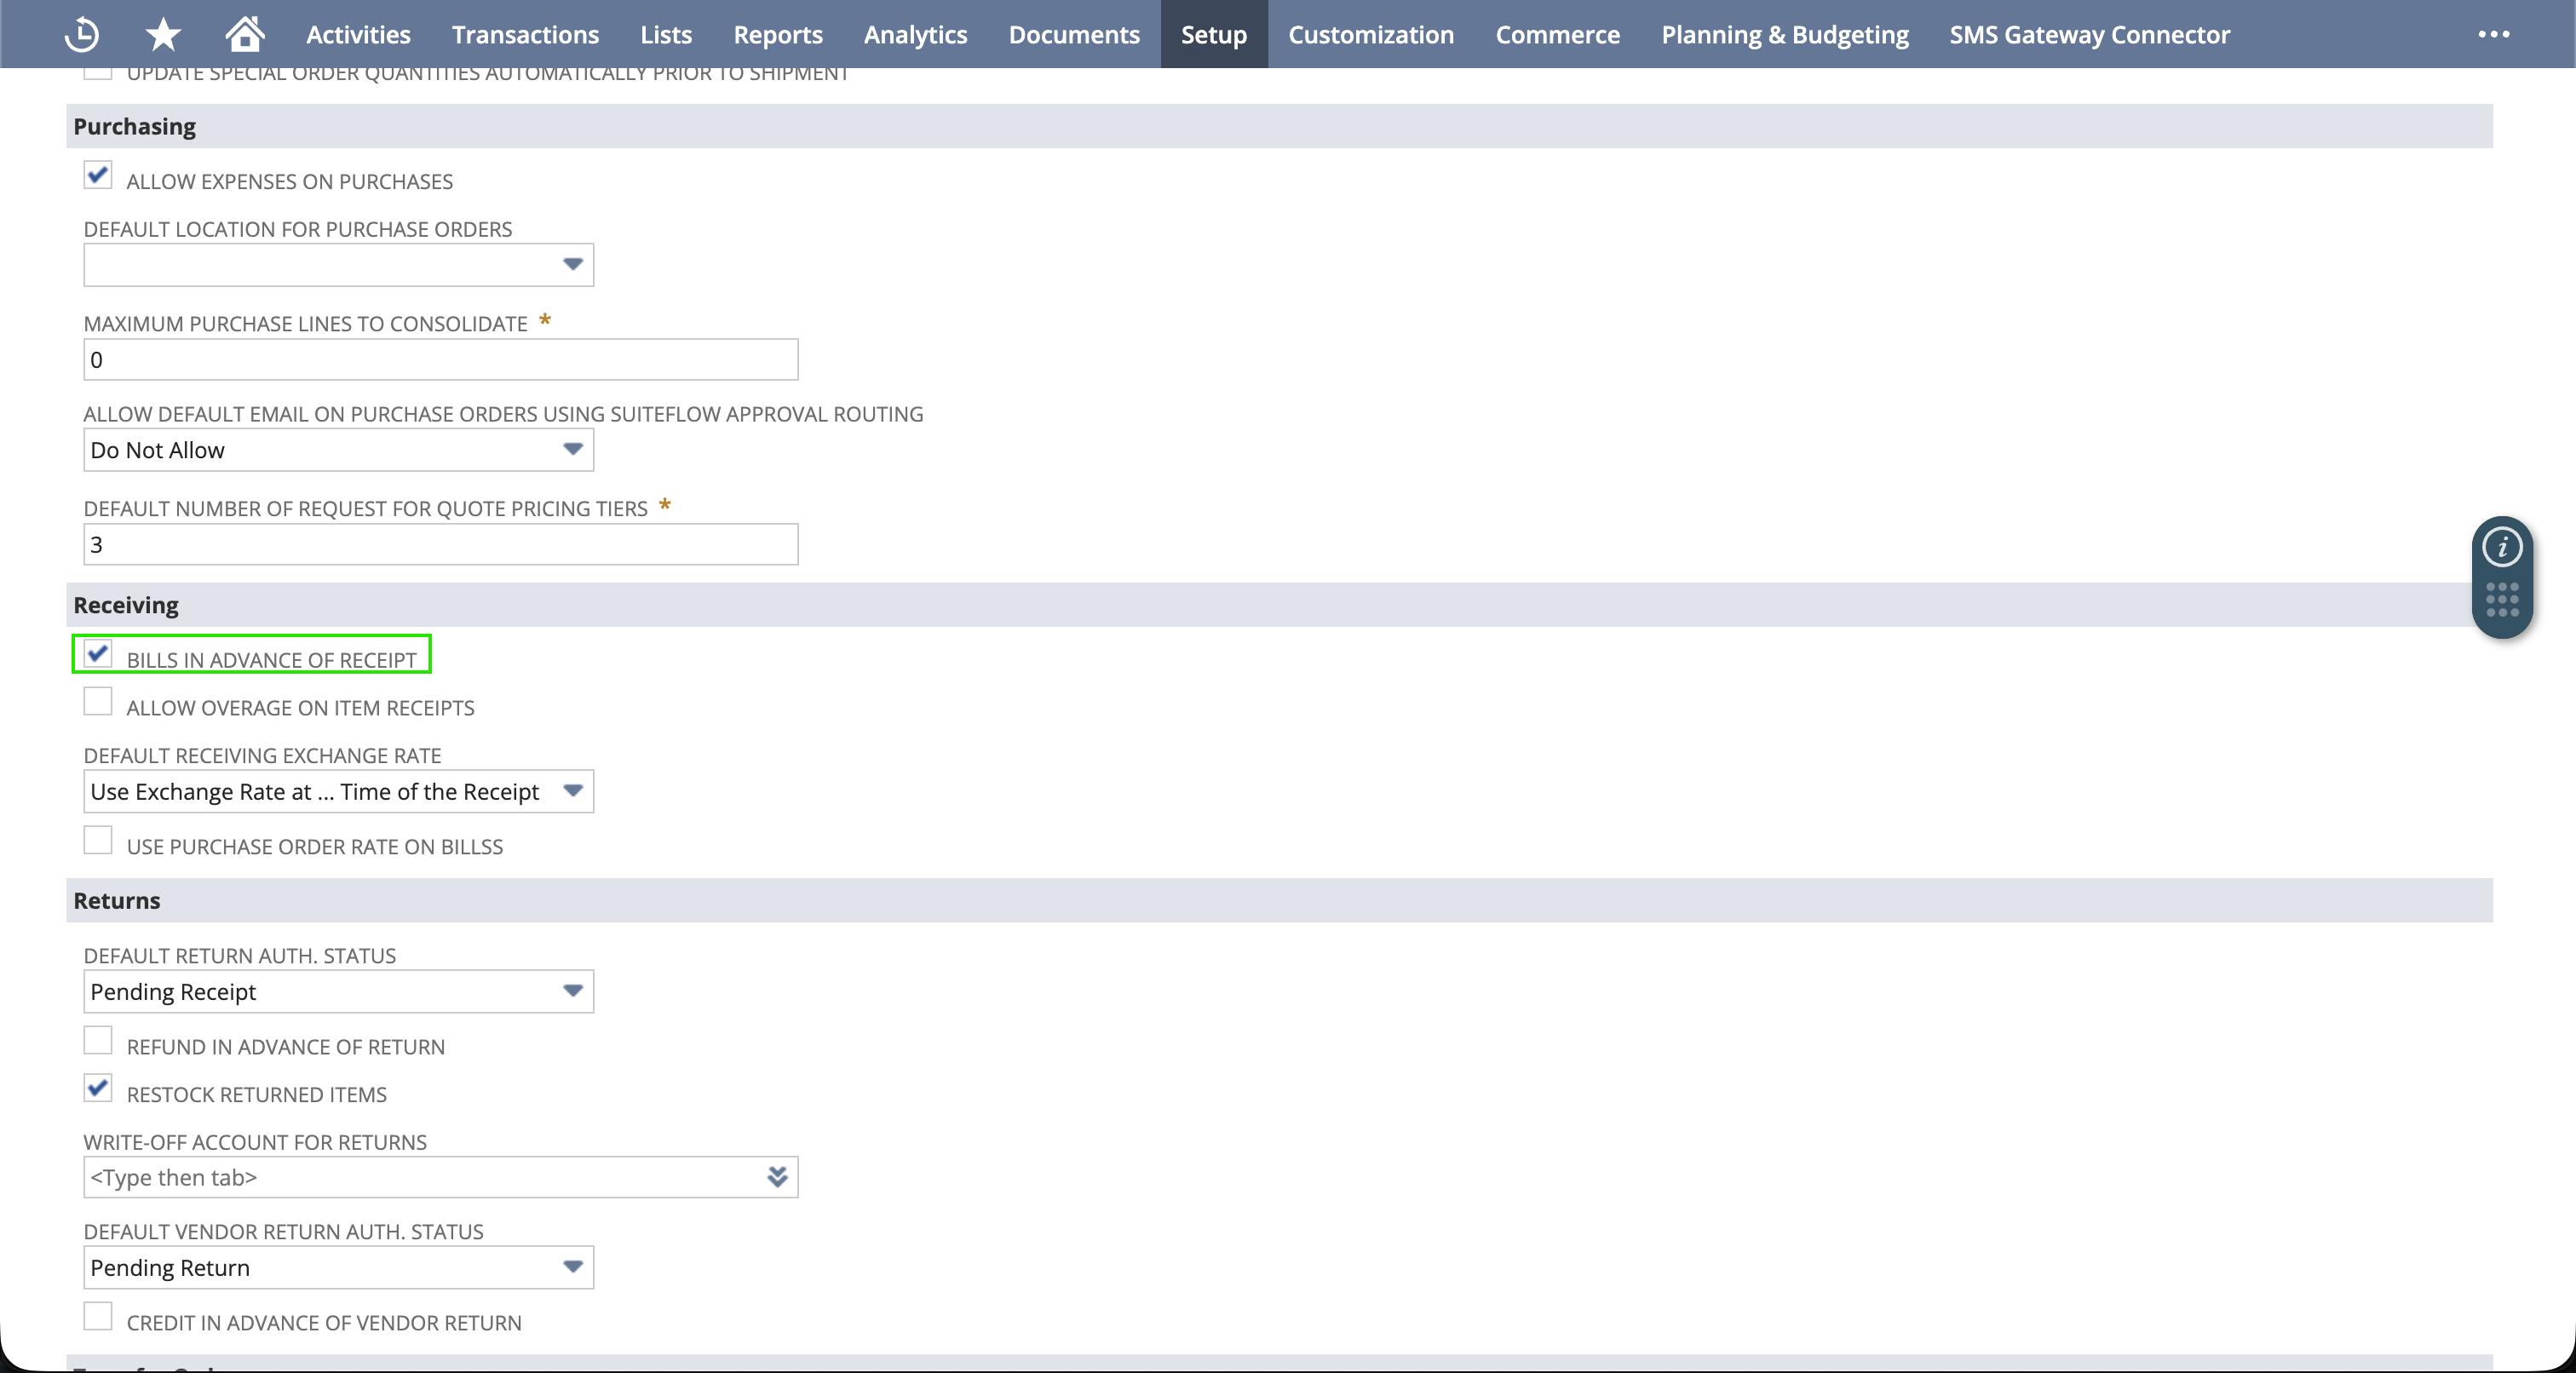
NetSuite normally wants an Item Receipt against a Purchase Order before a Bill can apply to it (Advanced Receiving). QuickBooks Online has no equivalent receiving step, so a migrated PO-and-Bill pair can fail to push with an "Invalid purchase order status" error unless you either:
- check Bills in Advance of Receipt under Setup → Accounting → Accounting Preferences → Order Management subtab, Receiving section, or
- manually create Item Receipts for the affected Purchase Orders before pushing the linked bills.
Two exceptions worth knowing. A PO made up of service items is billable right away, so neither fix is needed there. And if a PO is already fully billed (QBO allows this, NetSuite doesn't handle it the same way), linked bills keep failing with the same error no matter what you do here, because that's a different problem entirely. SuiteMigration doesn't currently support pushing a bill without its PO reference, so the only workaround is upstream: remove the PO reference from the bill in QuickBooks Online before it syncs, or create the bill directly in NetSuite without linking it to the PO.
Skip this item if you aren't migrating Purchase Orders.
8. Integration role has the permissions SuiteMigration needs (if using a restricted role)
Most people generate their Token-Based Authentication credentials (see Connect to NetSuite) using the Administrator role, which already has full access everywhere. If that's you, skip this item.
If you deliberately scoped down a custom role for the integration instead, it needs Full or Create/Edit access across the record types you're migrating: Transactions (Journal Entries, Invoices, Bills, Payments, Purchase Orders, etc.), Lists (Customers, Vendors, Items, Accounts), and any custom segments or custom records you're mapping into. Missing permissions usually don't block the whole push, since SuiteMigration works around a few known gaps automatically, but they can cause specific fields to silently fail to set, or whole records to get rejected.
Not sure if your role has broad enough access? Check it under Setup → Users/Roles → Manage Roles before your first push, rather than after a push produces something unexpected.
Ready to push
Once everything above checks out, start with a small push over a narrow date range and reconcile it before pushing your full history. This isn't a simulation. A Date Range Push creates real records in your destination NetSuite account, just scoped to fewer of them, so a small push first makes any problems cheaper to catch and undo. If you have a NetSuite sandbox account, test there before pushing to production. If anything looks off, contact support@suitemigration.com. We reply within one business day.