Migration Settings
Migration Settings are the settings that apply only to a single Migration inside a Project. Configure them once per Migration.
Where to find Migration Settings
- Open a Project and go to one of its Migrations.
- On the Migration overview page, expand the Migration Settings card.
Every setting below is inside that card. The card only appears after a source is connected. Destination-dependent fields (Tax Schedule, COGS Account, Default Discount Item) are visible but greyed out until a NetSuite destination is connected. Some settings only appear when the source is QuickBooks Online.
Item Settings
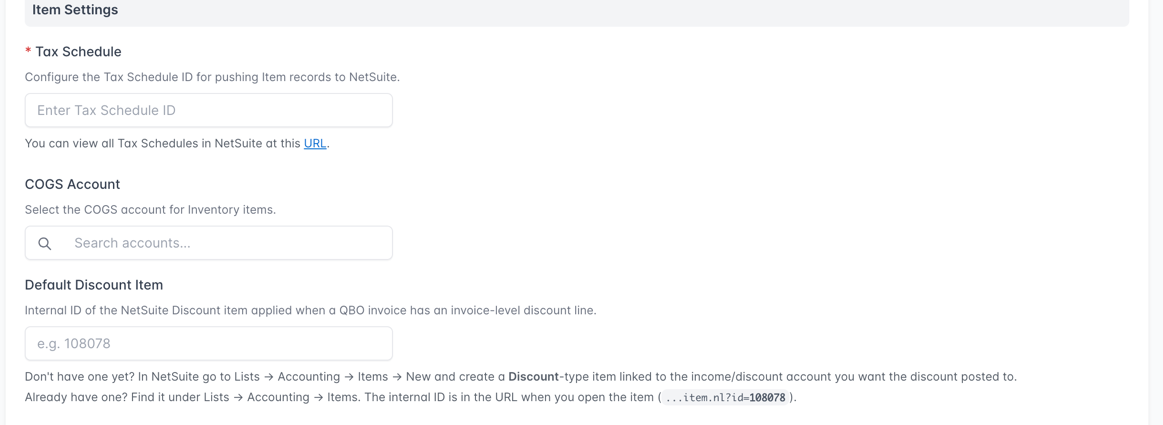
These settings control how Item records are pushed to NetSuite.
Tax Schedule (required)
The NetSuite Tax Schedule ID applied to every Item that SuiteMigration pushes.
- Enter the numeric NetSuite Tax Schedule ID.
- The URL link below the field opens the Tax Schedules list in your connected NetSuite account, where you can see the available Tax Schedule IDs.
COGS Account
The NetSuite COGS (Cost of Goods Sold) account used for Inventory-type Items.
- Start typing to search accounts pulled from NetSuite.
- Click an account to select it. Use the small x button to clear the selection.
Default Discount Item
The internal ID of a NetSuite Discount-type Item, used when a QuickBooks Online invoice has an invoice-level discount line.
- Enter the internal ID (for example,
108078). - To find or create one in NetSuite go to Lists → Accounting → Items. Open the Item and read the internal ID from the URL (
...item.nl?id=108078).
Customer & Vendor Settings

Name to Push
Which name SuiteMigration pushes to NetSuite as the customer or vendor company name.
- Display Name (default): the name users see in QuickBooks Online.
- Company Name: the QuickBooks Online Company Name field.
Fall back to the other name field
If checked, SuiteMigration will use the other name field when the chosen one is empty on a given record.
Payment Settings

NetSuite Payment Instruments feature enabled
This is checked by default. Uncheck it if your NetSuite account does not have the Payment Instruments feature turned on.
- Path in NetSuite: Setup → Company → Enable Features → Transactions.
- When enabled, Customer Payments push via NetSuite's
paymentOptionfield instead of the standardpaymentMethodfield. - If a push fails with a "no permissions to set paymentmethod / paymentoption" error, toggle this setting and re-push.
Retry Settings

Transient Error Retries
How many times SuiteMigration retries a push after a transient (temporary) error.
- Default: 1.
- Maximum allowed: 2. Any higher value is capped automatically.
Source Settings (QuickBooks Online only)

These settings only appear when the Migration's source is QuickBooks Online.
Use new QBO Reports API
When checked, Reports data is pulled from QuickBooks Online's new Reports API. Uncheck to use the legacy API.
Send summarize_column_by = Month (TrialBalance only)
Only visible when Use new QBO Reports API is on.
- When checked, SuiteMigration sends
summarize_column_by=Monthwhen pulling the TrialBalance report on the new API. - Other reports always send Month.
- Uncheck to omit
summarize_column_byentirely on TrialBalance.
Transaction Settings
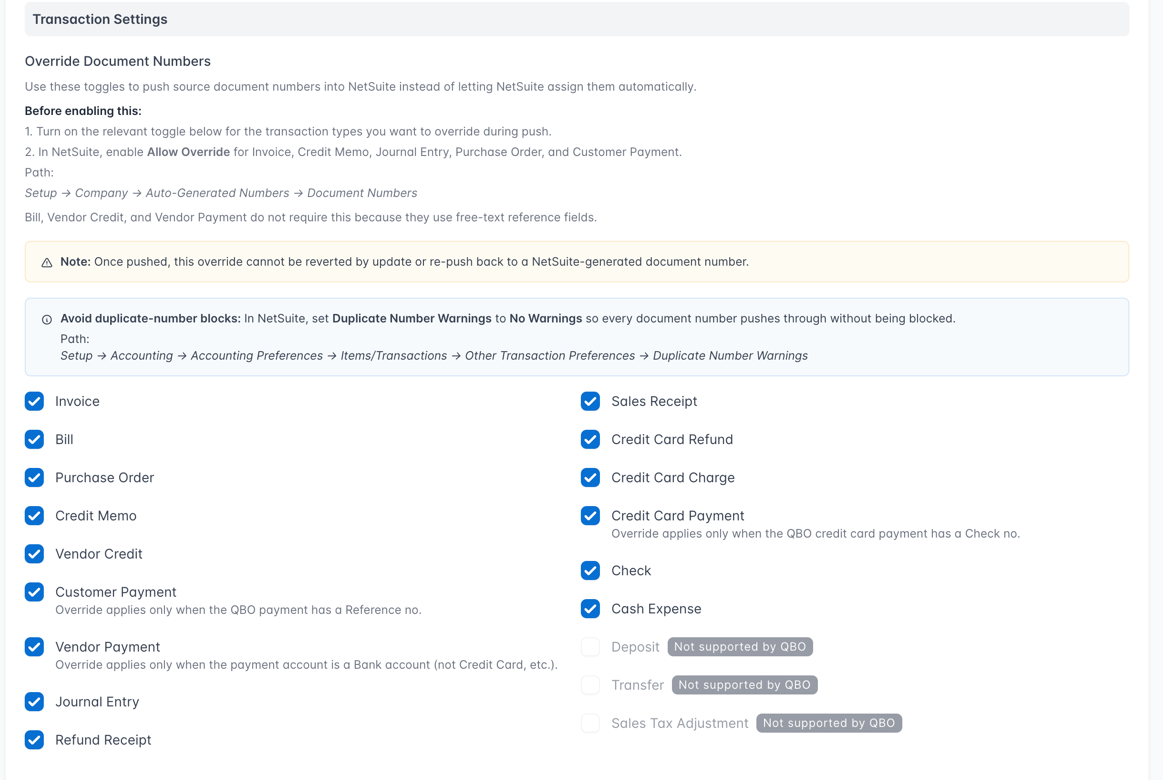
Override Document Numbers
By default, overrides are on for all supported transaction types -- SuiteMigration will push the source document number to NetSuite instead of letting NetSuite auto-generate one. Turn off the toggle for any type you do not want overridden.
Before your first push, complete these steps in NetSuite:
- Turn on Allow Override for the transaction types you plan to override. Path: Setup → Company → Auto-Generated Numbers → Document Numbers. This is required for Invoice, Credit Memo, Journal Entry, Purchase Order, and Customer Payment.
- Set Duplicate Number Warnings to No Warnings so pushed numbers do not get blocked. Path: Setup → Accounting → Accounting Preferences → Items/Transactions → Other Transaction Preferences → Duplicate Number Warnings.
Bill, Vendor Credit, and Vendor Payment do not need step 1 because they use free-text reference fields.
Important: Once a record is pushed with an overridden document number, that number cannot be reverted by update or re-push to a NetSuite-generated number.
Toggles available:
- Invoice
- Bill
- Purchase Order
- Credit Memo
- Vendor Credit
- Customer Payment (applies only when the QBO payment has a Reference no.)
- Vendor Payment (applies only when the payment account is a Bank account)
- Journal Entry
- Refund Receipt
- Sales Receipt
- Credit Card Refund
- Credit Card Charge
- Credit Card Payment (applies only when the QBO credit card payment has a Check no.)
- Check
- Cash Expense
Some transaction types (for example, Deposit, Transfer, Sales Tax Adjustment) show a Not supported by QBO badge because the QBO record has no document number to override.
Saving changes
Any change enables the Cancel and Save buttons at the bottom of the card. Click Save to persist. A success message appears once saved.