Connect to NetSuite
Overview
Authorizing NetSuite is a three-step process:
- Prerequisite For Using NetSuite Web Services.
- Creating Required NetSuite Credentials.
- Connect from SuiteMigration.
Step 1 — Prerequisite For Using NetSuite Web Services
To use the different NetSuite Web Services, you need to make sure their respective features are enabled in NetSuite before you connect from SuiteMigration.
- In NetSuite, go to Setup → Company → Enable Features.
-
Open the SuiteCloud subtab.
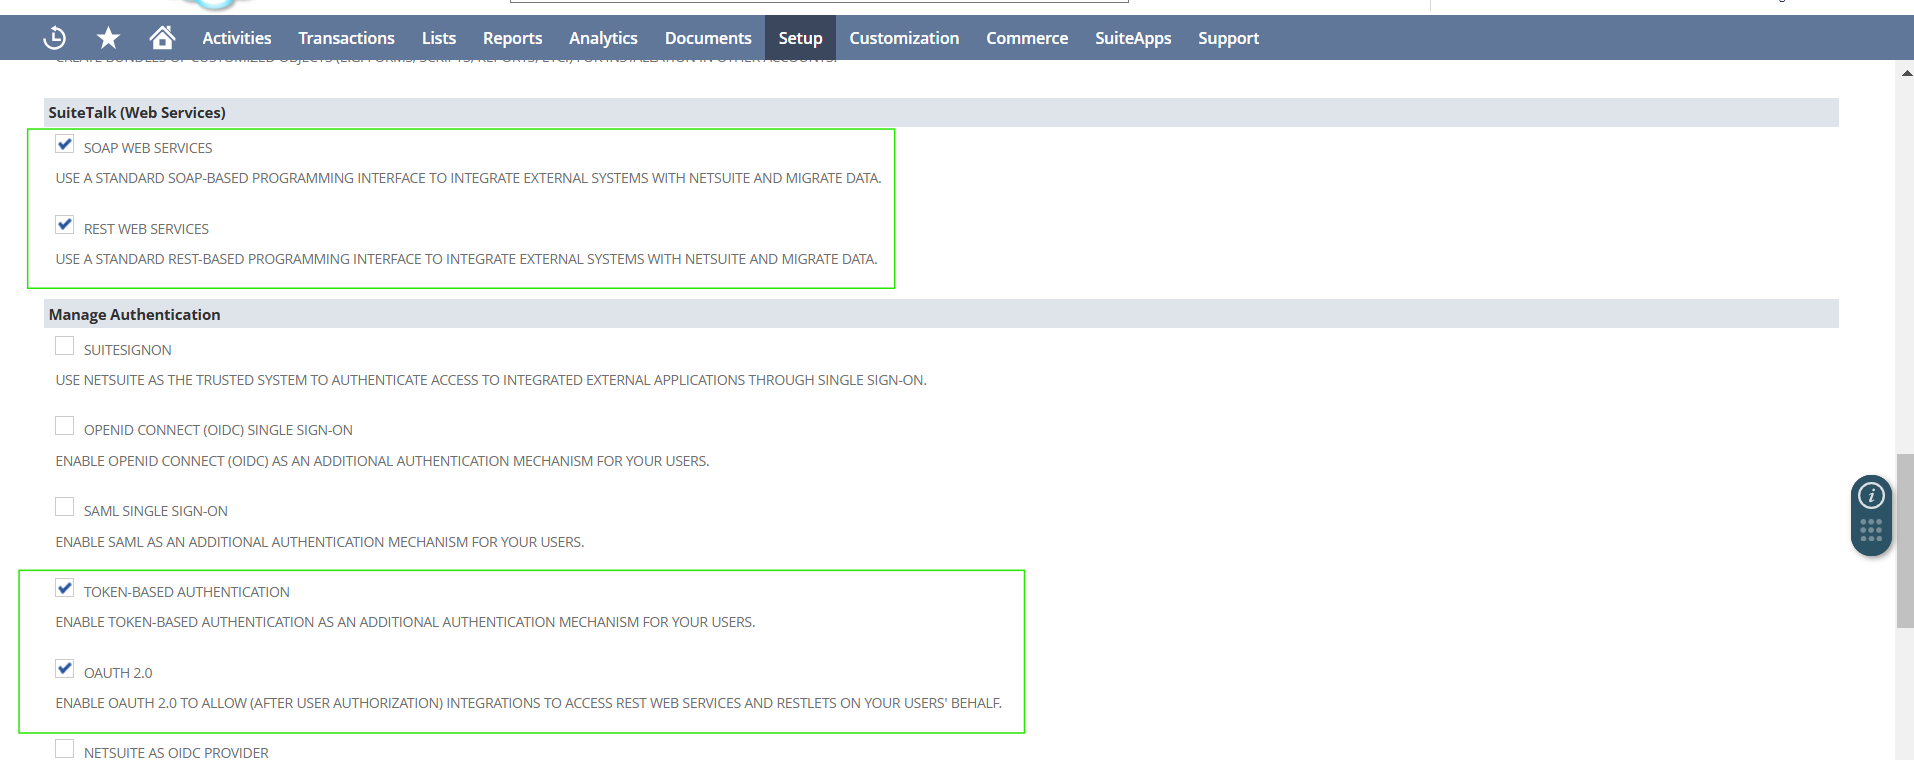
- In the SuiteTalk (Web Services) section, check:
- SOAP Web Services
- REST Web Services
- In the Manage Authentication section, check:
- Token-Based Authentication
- OAuth 2.0
- In the SuiteTalk (Web Services) section, check:
-
Open the Analytics subtab.
- Check the SuiteAnalytics Workbook feature.

-
Click Save.
Step 2 — Creating Required NetSuite Credentials
SuiteMigration uses NetSuite's Token-Based Authentication (TBA) features to connect to their API. The following NetSuite credentials are needed to make that connection:
- Account ID
- Consumer Key
- Consumer Secret
- Token ID
- Token Secret
Store these values somewhere secure. NetSuite shows each key or secret only once — if you lose it, you'll need to regenerate a new one.
Get the Account ID
- Go to Setup → Company → Company Information.
- On the Company Information page, you can see the Account ID value on the right column.
Create an Integration Record to Generate the Consumer Key and Consumer Secret
- Go to Setup → Integration → Manage Integrations → New.
- Fill in:
- Name:
SuiteMigration - State:
Enabled - Note: (optional) "Used by SuiteMigration to migrate data."
- Name:
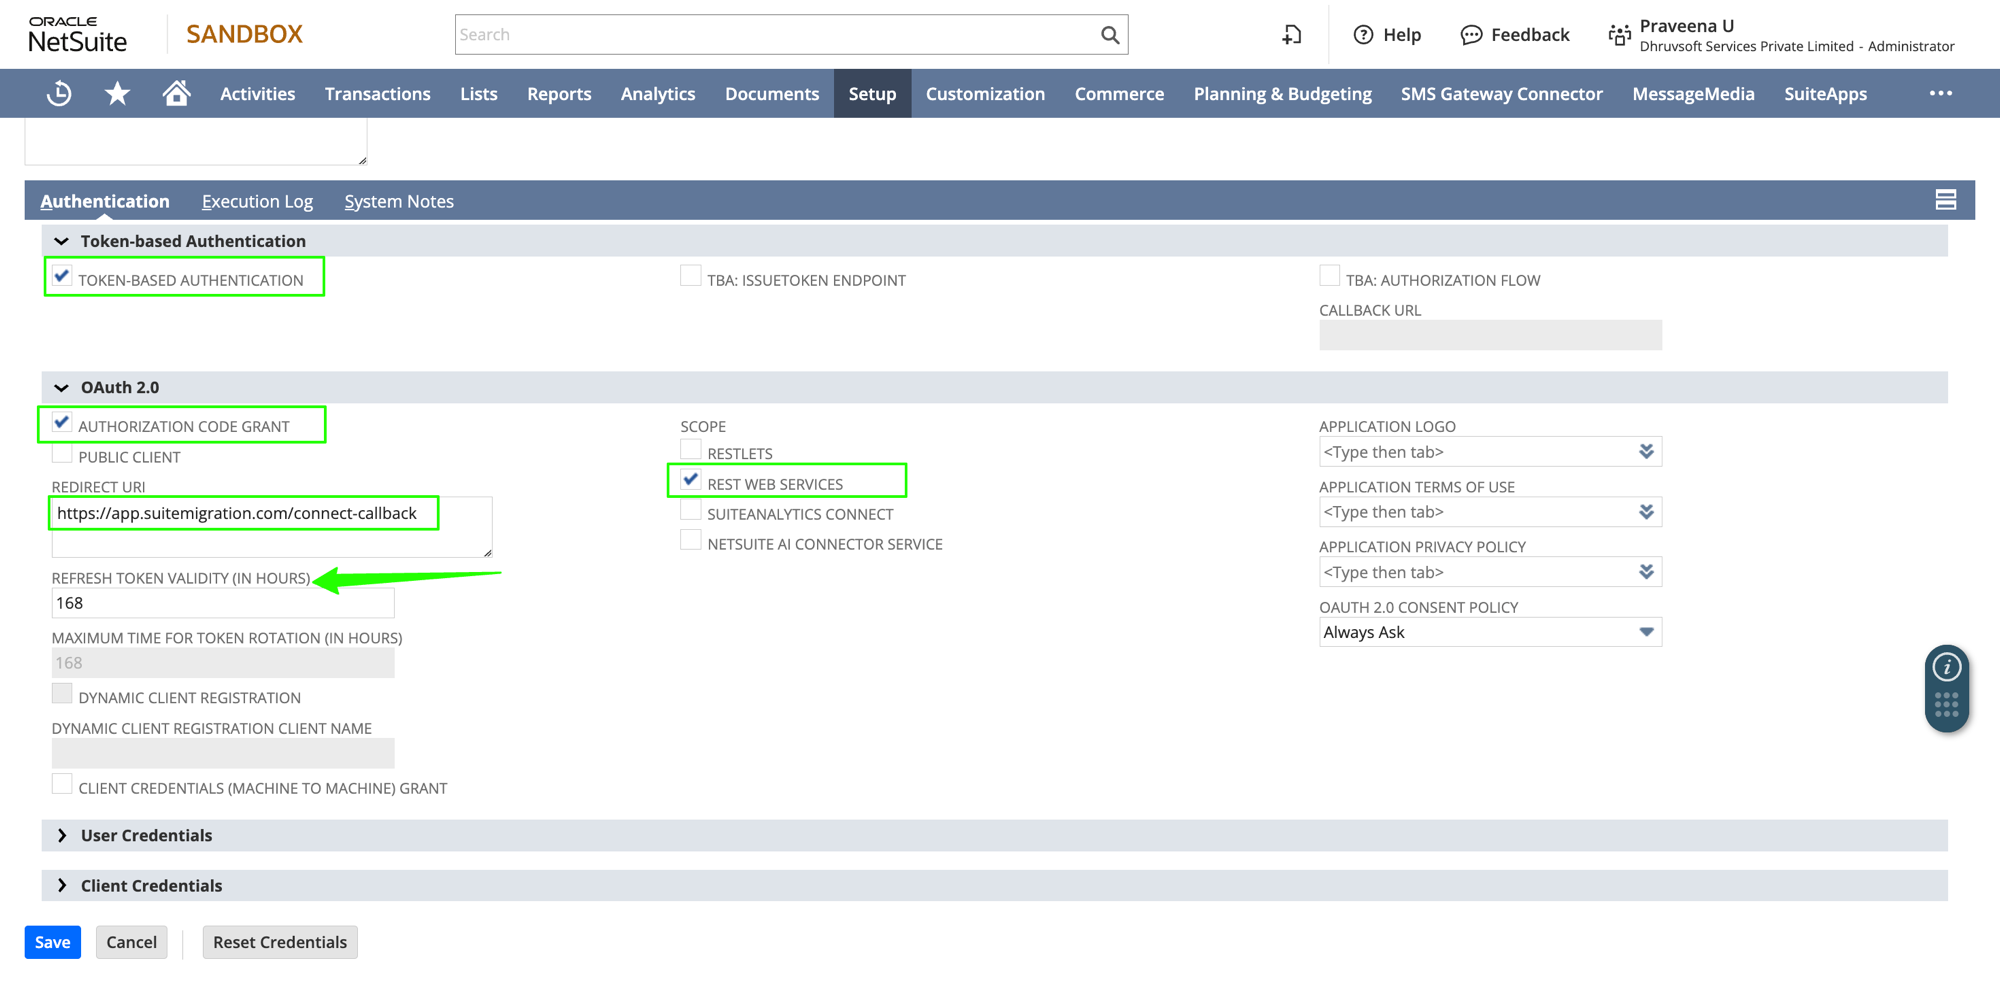
- Under the Authentication tab:
- Check Token-Based Authentication.
- Under OAuth 2.0, check Authorization Code Grant.
- Set Redirect URI to:
- Under Scope, check Rest Web Services.
- Click Save.
NetSuite will show a one-time page with a Consumer Key and Consumer Secret. Copy both values now — NetSuite will not show them again. Store them somewhere secure until you paste them into SuiteMigration.
Refresh Token Lifetime: By default, the OAuth 2.0 refresh token is valid for 7 days (168 hours). If your token expires before it is refreshed, you will need to reconnect.
- Set the REFRESH TOKEN VALIDITY (IN HOURS) field to the desired value in hours.
- Minimum: 1 (1 hour)
- Maximum: 720 (30 days)
We recommend setting this to 720 to minimize the chance of an expired session.
Generate the Token ID and Token Secret
- On the NetSuite Home page (indicated with a Home icon), in the lower-left corner, there is a section called Settings. Towards the bottom of that, click Manage Access Tokens.
- Click New My Access Token.
- On the Access Token page select SuiteMigration (the integration record you created above).
- Click Save. Sensitive data will be shown when clicked.
- Copy the Token ID and Token Secret — they will appear only once. If you navigate away from the page you will have to recreate another access token.
Step 3 — Connect from SuiteMigration
- In SuiteMigration, open your migration.
- On the Source/Destination card, click Add Source/Destination.
- In the modal that opens, select Create a new Source/Destination Connection.
- Choose NetSuite as Source/Destination and click Next.
-
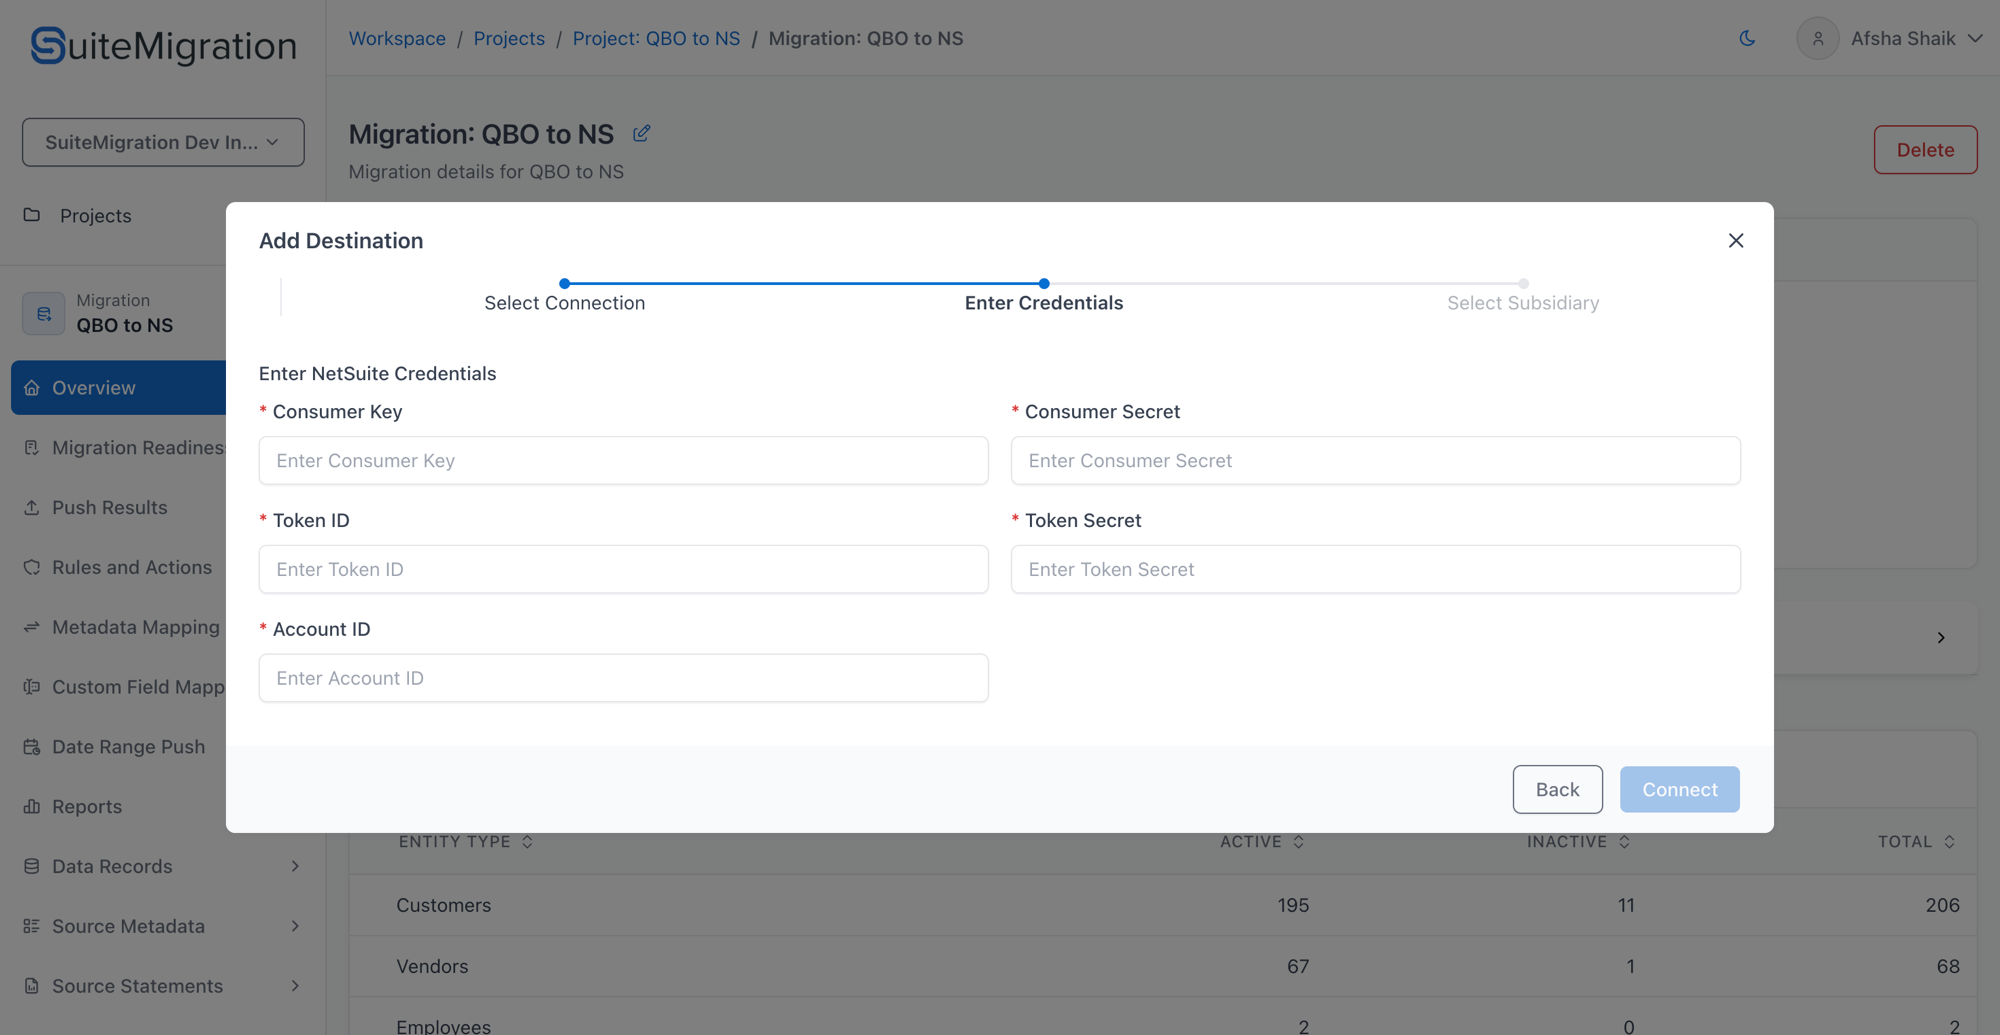
On the Enter Credentials step, enter your NetSuite credentials:
- Consumer Key
- Consumer Secret
- Token ID
- Token Secret
- Account ID
-
Click Connect.
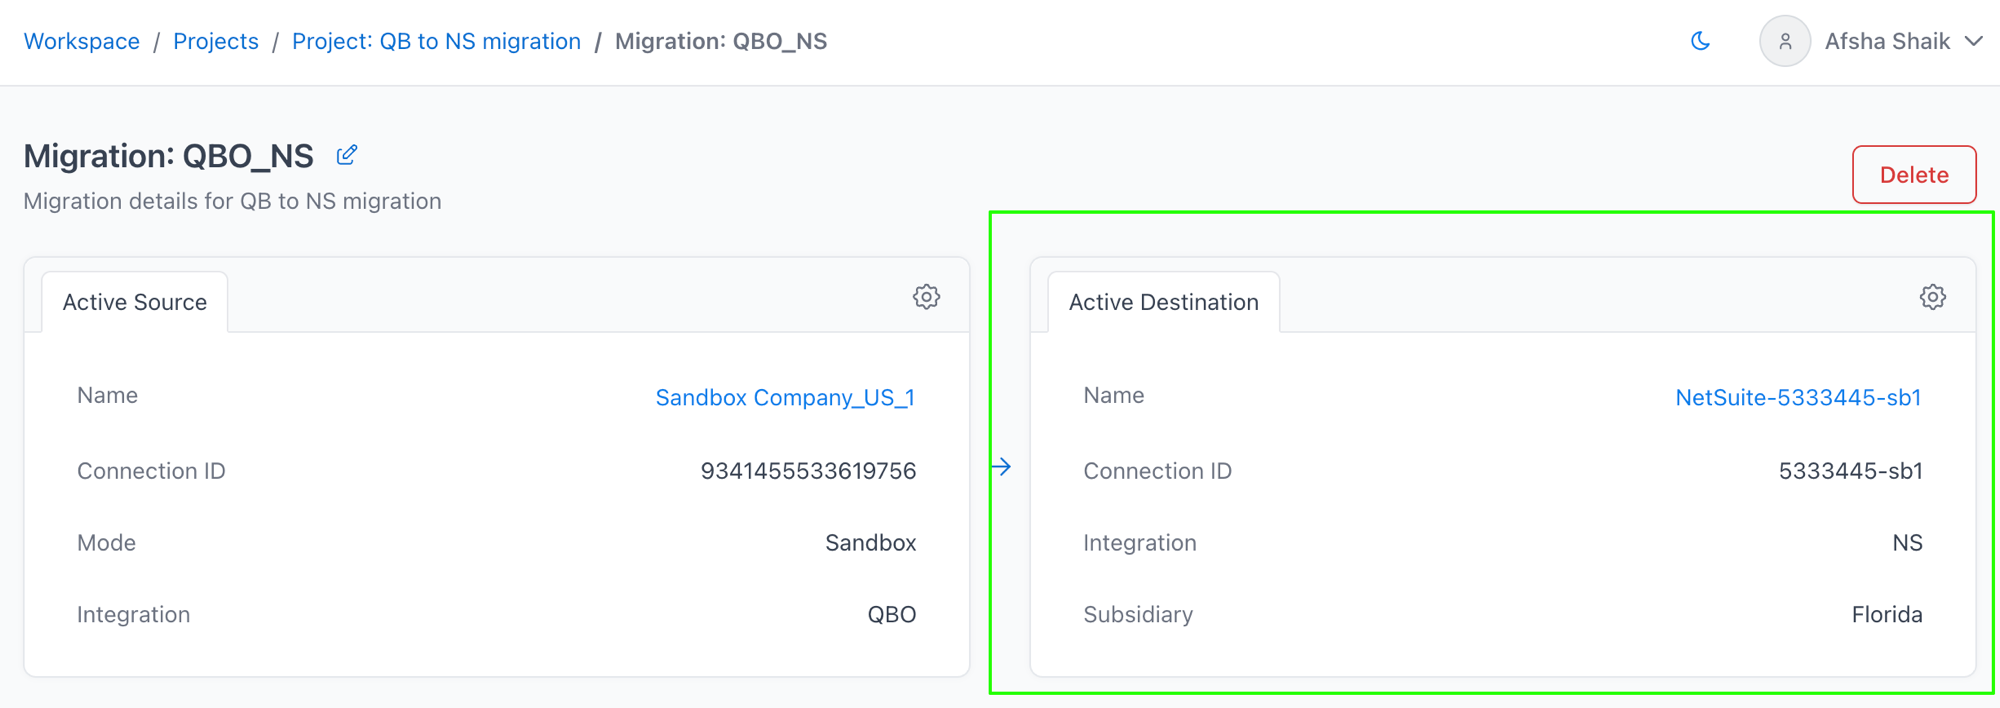
- Select the subsidiary on the next step.
-
You should now see that SuiteMigration indicates a successful connection.
Troubleshooting
If the connection fails, confirm:
- One of the many checkboxes was checked or unchecked in NetSuite.
- Your token credentials were entered correctly with no leading or trailing whitespace.
Contact support@suitemigration.com if you need help.